
When it comes to improving your website, there are many free and paid tools available. The ones you use will depend on your goals. However, there’s one versatile tool that can help you enhance almost any website.
Google Analytics is a freemium product that offers a variety of invaluable site statistics and tools. By adding Google Analytics to your site, you can do a lot to improve its overall performance and boost the user experience.
In this post, we’ll introduce you to Google Analytics. This will include a look at how your site can benefit from its use, as well as a few of its best features. We’ll also show you how to put Google Analytics to use on your WordPress website. Let’s get started!
Introducing Google Analytics
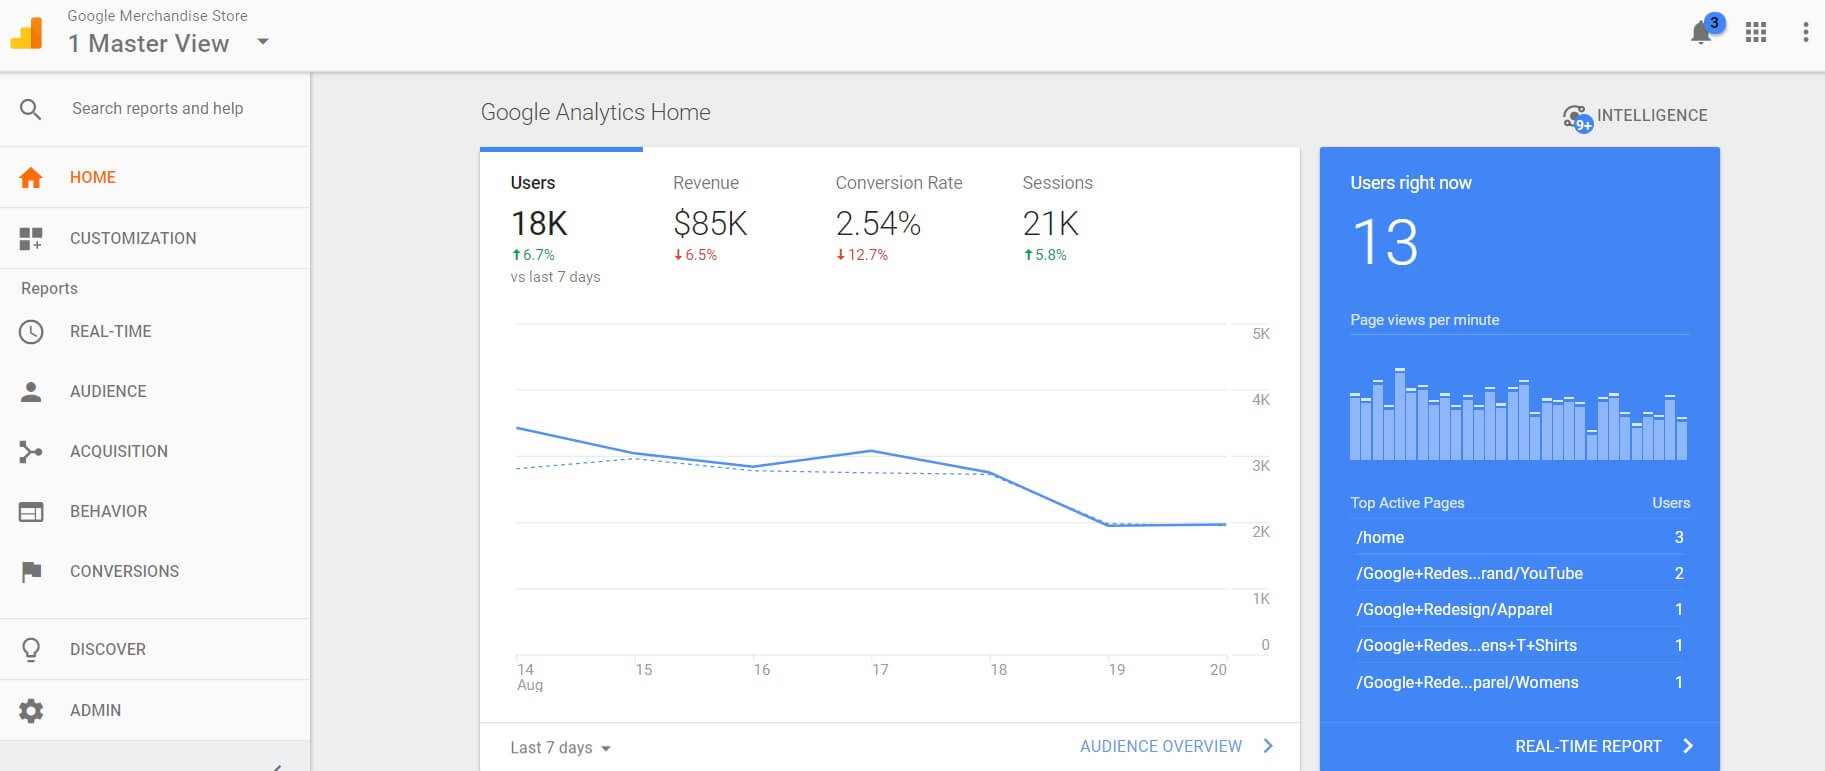
Whether you want a snapshot of data or an in-depth look at website results, Google Analytics enables you to keep an eye on operations with ease.
Google Analytics is a freemium product that entered the scene in November of 2005. As a free web analytics tool that offers insight into traffic and web patterns, it soon became a hit and continues to be the most popular analytics tool on the market.
By including Goals, AdWords integration, and real-time user monitoring, Google Analytics offers a wealth of information for beginners and advanced WordPress users alike.
The great thing about Google Analytics is that advanced information – such as visitor demographics and advanced customer data – is right at your fingertips. The configuration of your settings is simple, and you can track just about anything that you’d need to know about your website.
How to Use Google Analytics to Supercharge Your WordPress Website
Google Analytics has dozens of features. However, we’ve chosen the four below because they can be some of the most effective and most easily implemented on your website. Let’s dig in!
1. Rank Higher on Search Engine Results Pages (SERPs) Using Keywords
SERPs are the pages on search engines that direct users to websites based on the keywords they’ve entered. Of course, this means the higher you rank, the better chances of increasing organic traffic to your website.
How to Set Up Keywords
Unfortunately, Google Analytics removed its own Keywords tool. However, you can easily reintegrate this feature back into the Google Analytics dashboard by linking your Analytics’ account to Google Search Console.
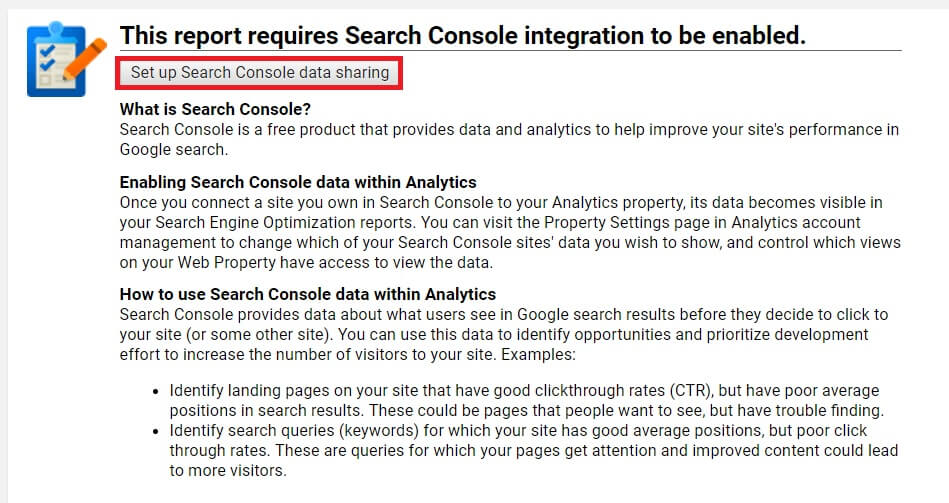
You’ll first need to set up Google Search Console on your website, and then enable the connection by going to Acquisitions > Search Console > Landing Pages. Click Set Up Search Console Data Sharing:
You’ll be brought to the Admin screen, where you can now edit Console settings by selecting Adjust Search Console.
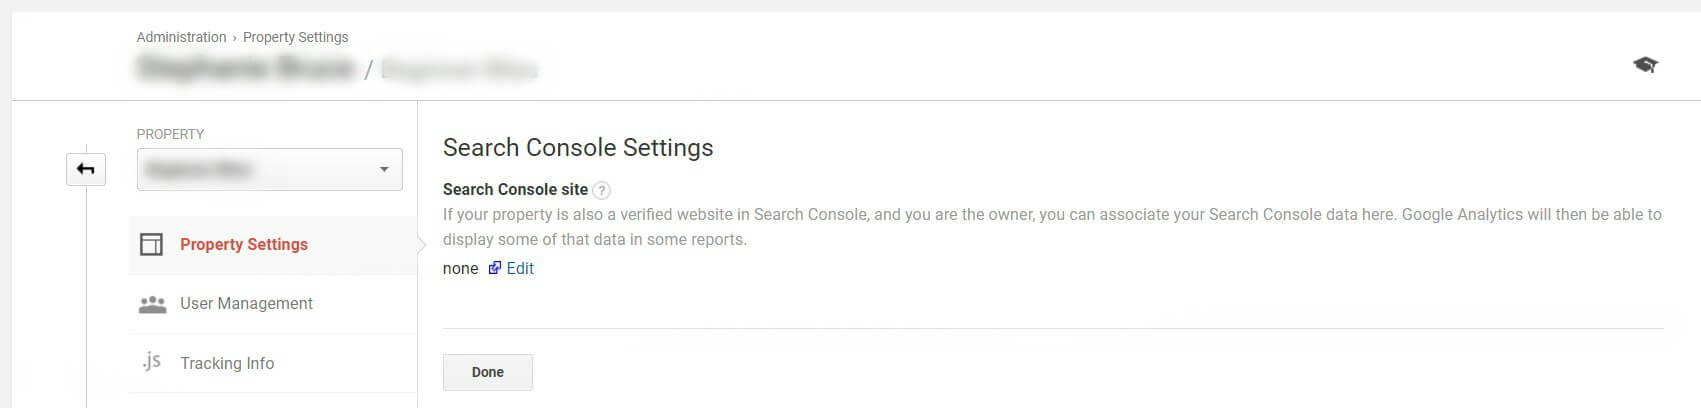
Click Edit and then choose the website you would like to associate. Click Save, and you can now return to the Google Analytics tab and click Done.
How to Analyze Keywords
To find out which keywords your audience is using to find you, go to Acquisitions > Search Console > Queries. Scroll to the table at the bottom of the page, and you can now see the keywords (Search Queries) used to find you.
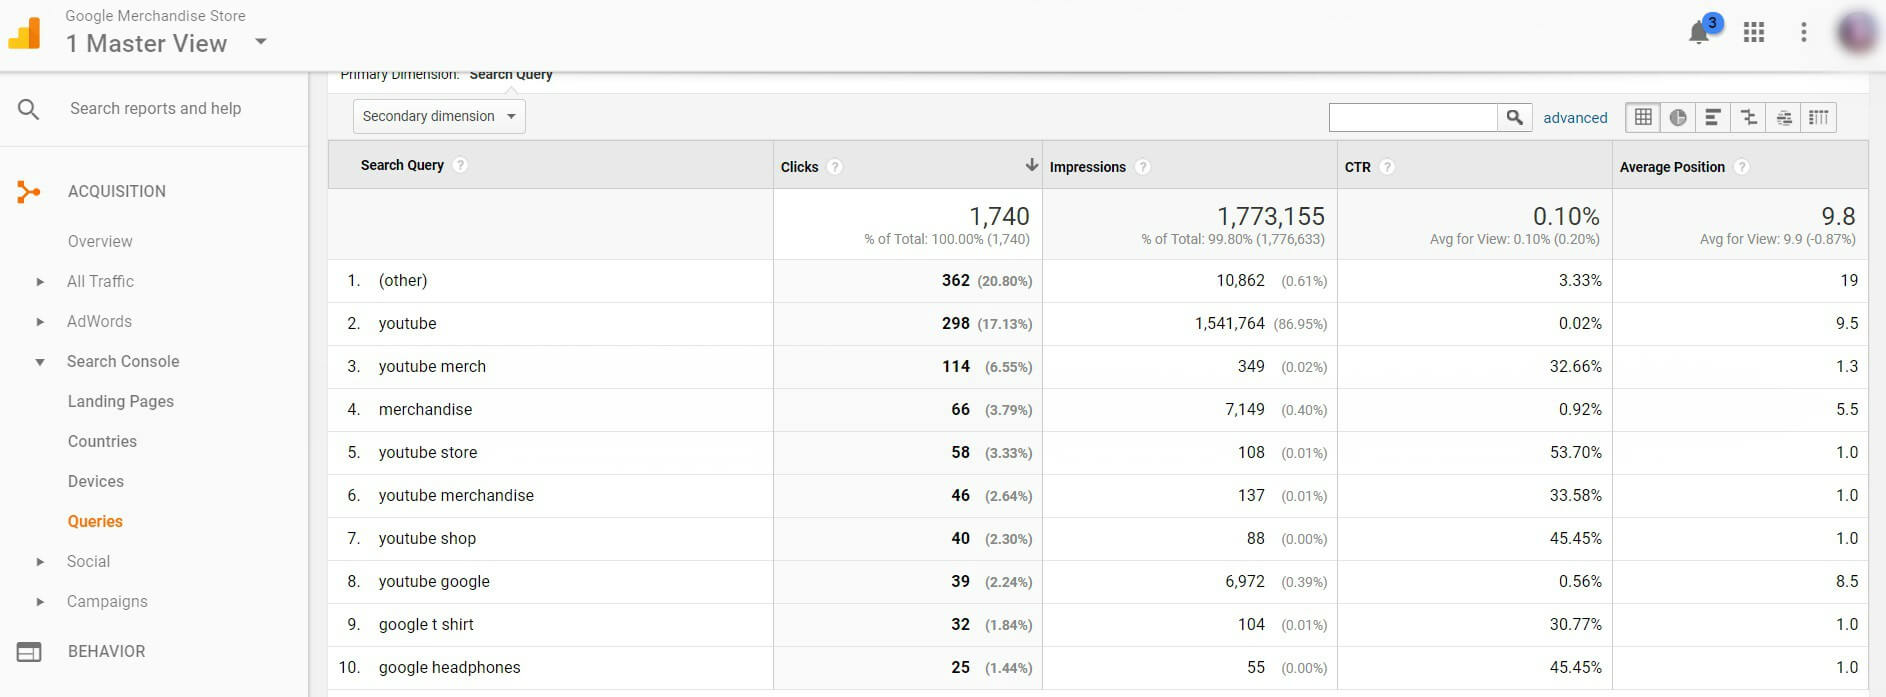
You’ll also see how many clicks and impressions your website has received from the SERPs. You can also see the Click Through Rate (CTR) and Average Position on the SERPs. With this information, you’ll be better placed to improve your Search Engine Optimization (SEO) campaign.
To use these keywords to your advantage, you’ll need to optimize your position within Google’s SERPs and improve the CTR on each keyword. How? This involves crafting relevant copy for the SERPs (known as the meta title and meta description).
2. Track and Achieve Business Tasks Using Goals
To move your business forward, you must have goals in place. Whether these are conversions, traffic numbers, or user engagement, such goals can give you a specific place to direct your attention.
How to Set Up Goals
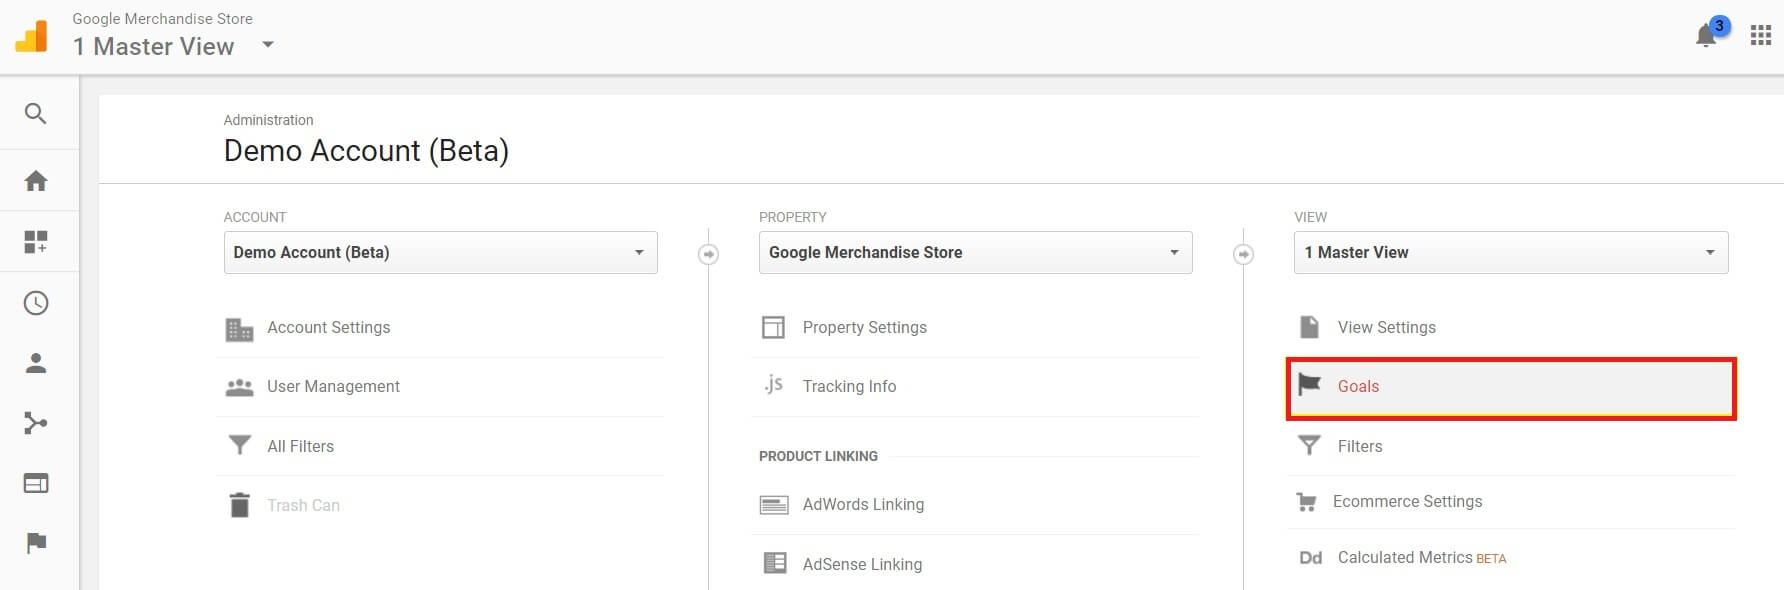
Within Google Analytics, you can create, edit, and share goals. To begin, go to Admin > Goals located under View. Select + NEW GOAL or Import from Gallery. Additionally, you can select any previously created goals to edit.
From here, you can create goals in three ways (using a template, creating custom goals, or with Smart Goals). Now you can set up goal options, after which you can click Continue to finish configuration.
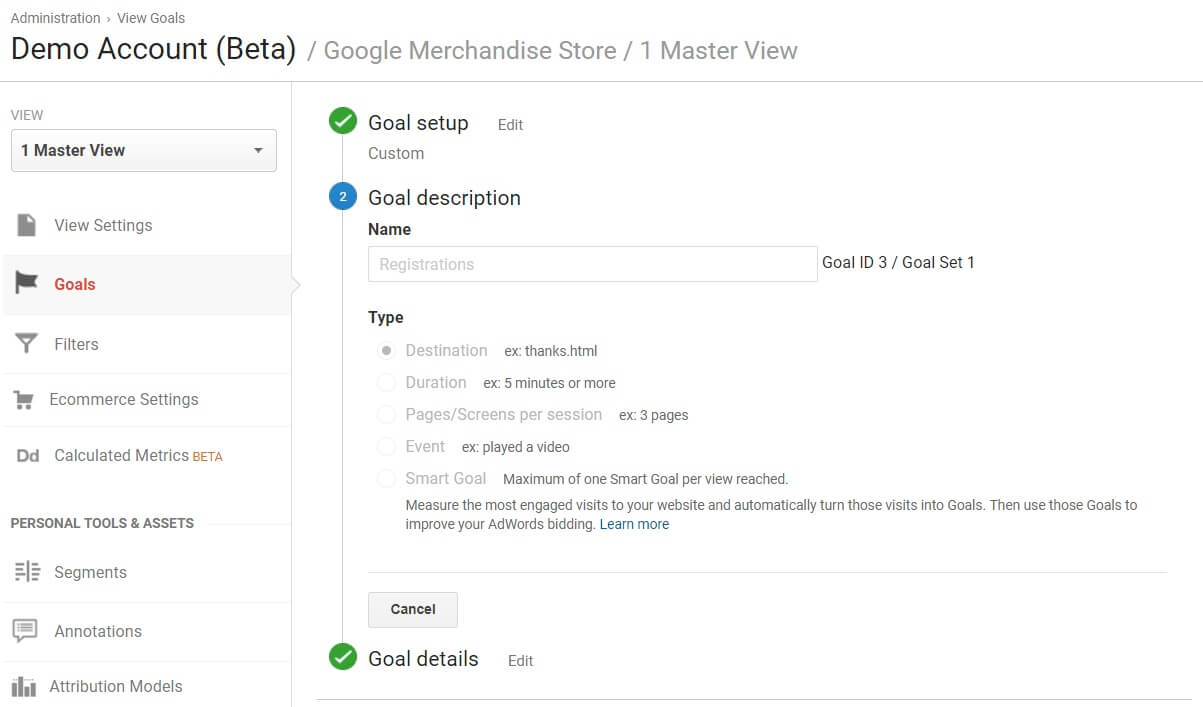
Additionally, you can Verify this Goal. This shows you how the goal would have performed over the past seven days (using data within your Google Analytics dashboard, if available).
How to Analyze Goals
With goals now set up, it’s time to take a look at how far you’ve come in reaching them. To do so, navigate to Conversions > Goals > Overview.

Go to the drop down menu above the graph that says Goal Completions and select the goal you would like to further analyze. You can even click Select a metric to compare one goal to another. With Google Analytics, you can track almost any website goal imaginable (including conversions, traffic, sales, and more). You can then use the information to improve upon your goals and, as a result, your business site.
3. Optimize Your Content and Target Your Audience Using Demographics
The content on your website is meant to enhance your reader’s experience. However, you must target this content to increase user engagement and improve conversions.
Fortunately, there is a feature within Google Analytics that enables you to keep track of user information. These are known as demographics, and they can be a potent marketing tool.
How to Set Up Demographics
Using Google Analytics’ Demographics feature, you can track and analyze demographic data to better target your audience. You’ll first need to update Analytics to support Advertising Reporting Features. Then, go to Admin > Property Settings (be sure to select the right property from the drop down) > Advertising Features. Set Enable Demographics and Interests Reports to ON and click Save.

Within the next 24 hours, you’ll begin to see data collecting within your Google Analytics’ Reports. With this information in hand, you can now move forward.
How to Analyze Demographics
Including age, gender, in-market segments, and affinity categories, you can learn so much about your audience. With this information, you can then create remarketing audiences to further target your visitors.
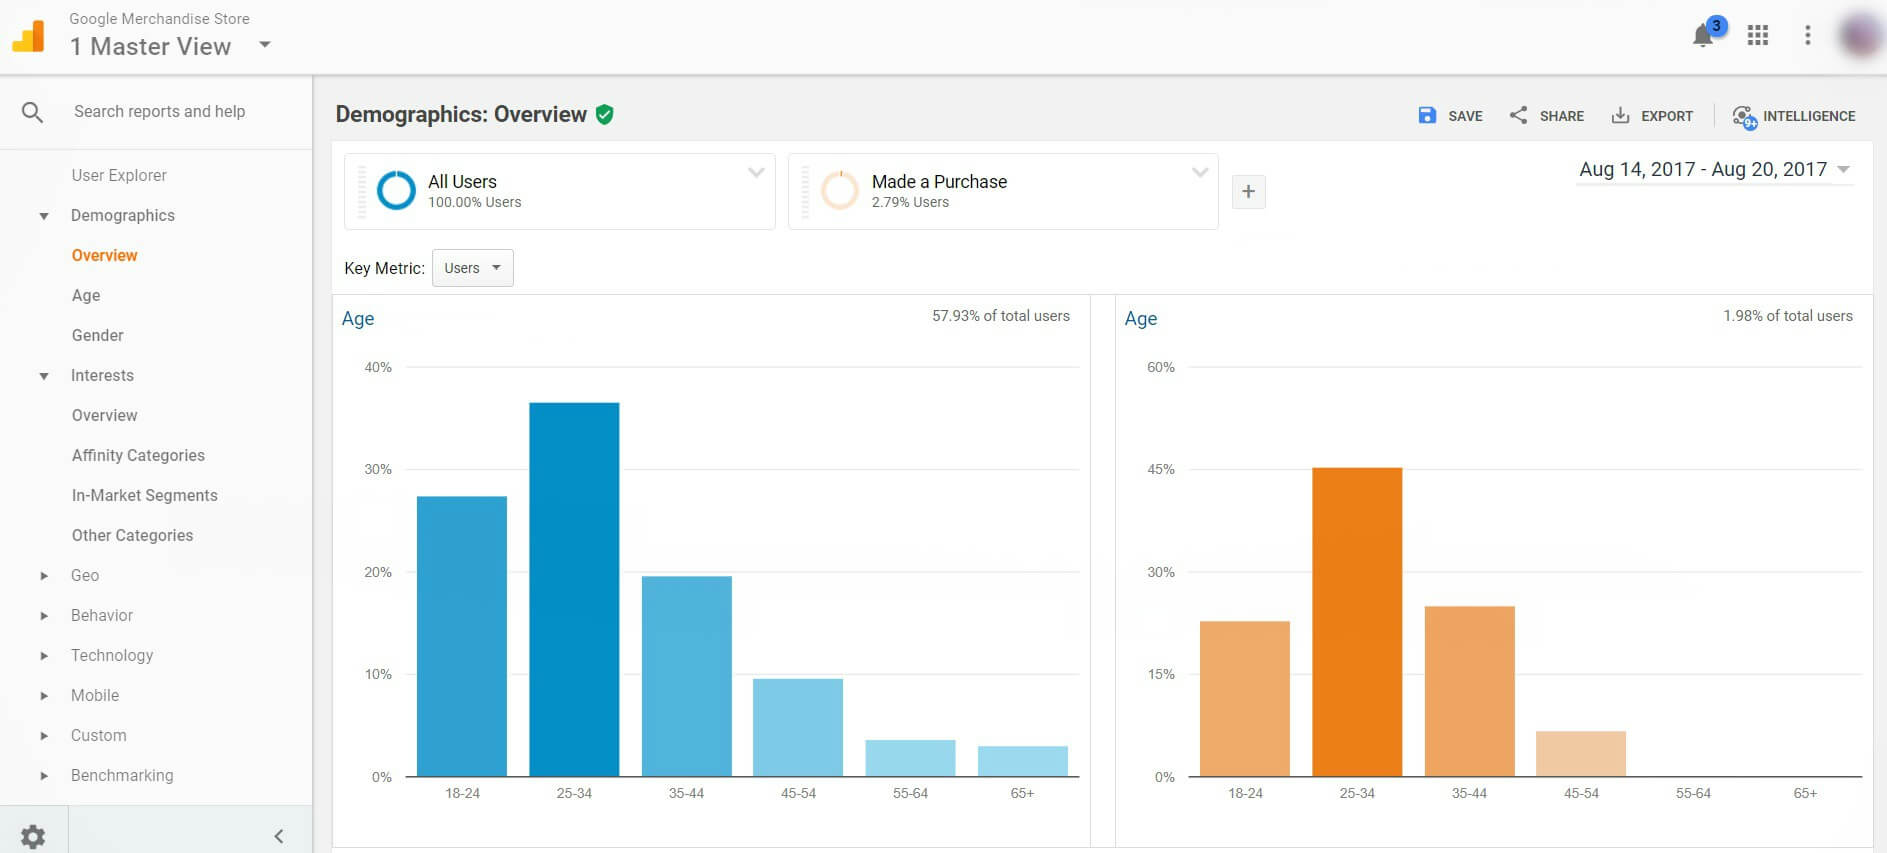
To see the collected data, go to Audience > Demographics > Overview. This will give you a general look at the age and gender of website visitors, but you can break this down further by clicking + Add Segment and choosing from the list of options. For example, you can see how many people made a purchase on your website with a breakdown of their age and gender:
You can also go to Audience > Interests > Overview to learn more about your visitors (such as Affinity Category and In-Market Segment). You can then use this information to offer more relevant content to your readers.
4. Boost Conversions and Track Sales Data Using Ecommerce Tracking
E-commerce tracking is an essential tool for marketers and online store owners enabling you to understand how well your business is going and whether you are meeting your business goals. By tracking sales data, you can then get a better overall picture of your progress.
How to Set Up Ecommerce Tracking
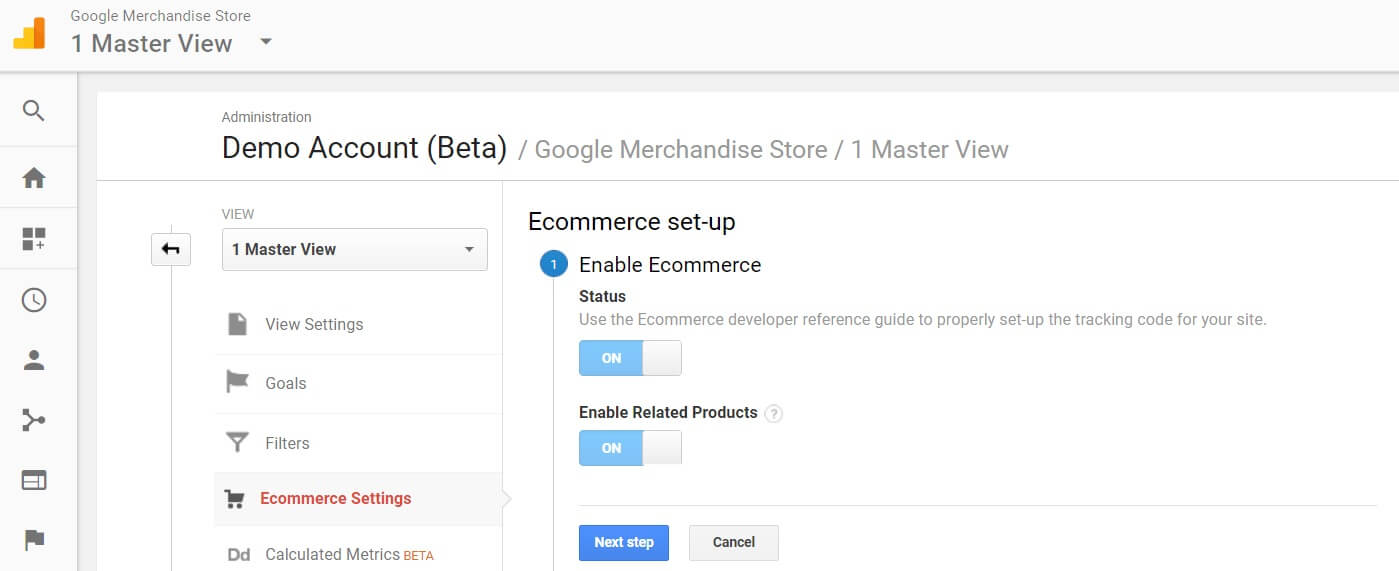
To set up Ecommerce Tracking within Google Analytics, go to Admin > Ecommerce Settings (be sure to select the correct View from the drop down). Set Enable Ecommerce to ON, and you can also set Enable Related Products to ON if you’d like.
This step will also require the addition of a tracking code to your website’s HTML. This enables the data to be sent directly from your site to Google Analytics.
How to Analyze Ecommerce Data
With your tracking set up, you can now track conversions (though it can take up to 24 hours for e-commerce reports to be available). Go to Conversions > Ecommerce > Overview on the left menu of the Google Analytics dashboard.
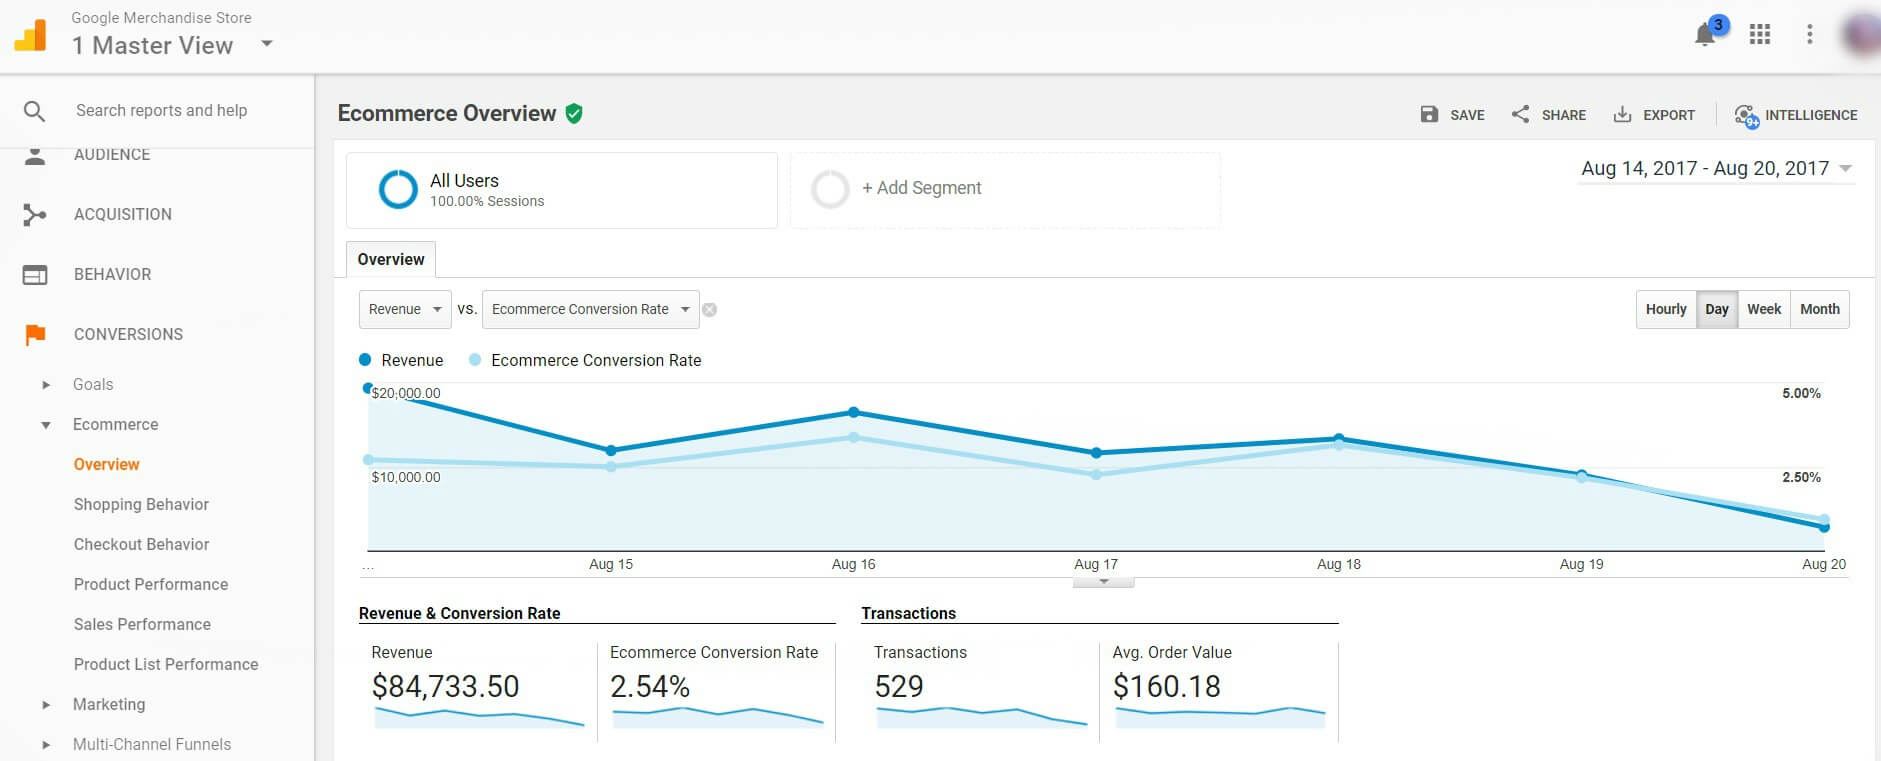
Here you can analyze revenue and conversions, transactions, and even top sellers. For more detailed information, go back to the left navigation menu and select the other options under Ecommerce. Here, you’ll find data on Shopping Behavior, Checkout Behavior, and even Product Performance.
Conclusion
User experience is an essential element of any successful website. With Google Analytics the information you collect will give you the information you need to enhance your website and improve its operations. This is beneficial to you and your visitors.
In this post, we’ve discussed the benefits of Google Analytics and how to use a few of its main features on your website. To recap, some of the best ways you can use this tool to supercharge your website include:
- Rank higher on SERPs using Keywords.
- Track, achieve, and outperform business tasks using Goals.
- Optimize your content and target your audience using Demographics.
- Boost conversions and track sales data using Ecommerce Tracking
Do you have any questions about how to use Google Analytics to supercharge your website? Let us know in the comments section below!
Image credit: Pexels.