So you want to move your WordPress website to a new location. Perhaps you’re fed up with your existing hosting provider, you’ve spotted a bargain elsewhere, or maybe you read our post on optimizing WordPress performance and you are finally ready to a move to a premium hosting provider. The process can seem daunting, however, and you may not be sure where to begin.
Fortunately, we have the solution! With the proper tools and guidance, moving your WordPress website can be a simple and painless process. In fact, you don’t need any pre-existing technical knowledge or know-how to make the move.
In this post, we’ll introduce you to site migrations, and scenarios where you’d need to migrate your site. Then, we’ll show you the simple, step-by-step procedure for migrating your WordPress site with the help of WPBackItUp. Let’s get started!
Why You’d Need to Migrate Your WordPress Site
Site migration is the process of moving your WordPress website from one location to another. For the majority of migrations, this new location tends to be a new hosting provider. However, you can also migrate your site to a new server or domain within the same host.
But what’s the point of moving your WordPress site from one host to another? Let’s take a look at three of the most common reasons:
- Your current host isn’t meeting your needs. Perhaps your site’s traffic has grown exponentially since the creation of your site, and your current host cannot meet such demands. Alternatively, maybe you require more in-depth services that your existing provider doesn’t offer.
- You’re unhappy with your provider’s service. Let’s face it – even companies in the industry of customer service can have some less-than-stellar customer support options. If you’re fed up with such a situation, then finding a more customer-oriented site host just makes sense.
- You’ve found a better deal elsewhere. There’s a wide range of prices and service offerings in the web hosting industry. In fact, some deals are so good, they may compel you to jump ship.
No matter your reason for migrating your site, there’s a simple process you can undertake to get the job done.
How to Migrate Your WordPress Site (in 3 Simple Steps)
Site migrations are a common occurrence. As you might imagine, there’s a variety of migration tools available. However, with one-click backup and one-click restore features (not to mention a user-friendly interface), we recommend our very own WPBackItUp plugin for your site migration needs.
Site migration is a premium feature of our plugin. This means you will need to purchase a license prior to use. Once you’re all set with that, you’re ready to get started!
Step #1: Backup Your Site With WPBackItUp
Creating a site backup isn’t a required part of the migration process. However, it’s always a good idea to backup your site prior to making any changes. This will ensure that no vital data is lost during whatever task you’re performing, and that a backup is available for restoration should the unthinkable occur.
After WPBackItUp is installed, you’re ready to backup your site. First, locate WPBackItUp on the WordPress sidebar. Then, hover over the menu option, and select Backup:

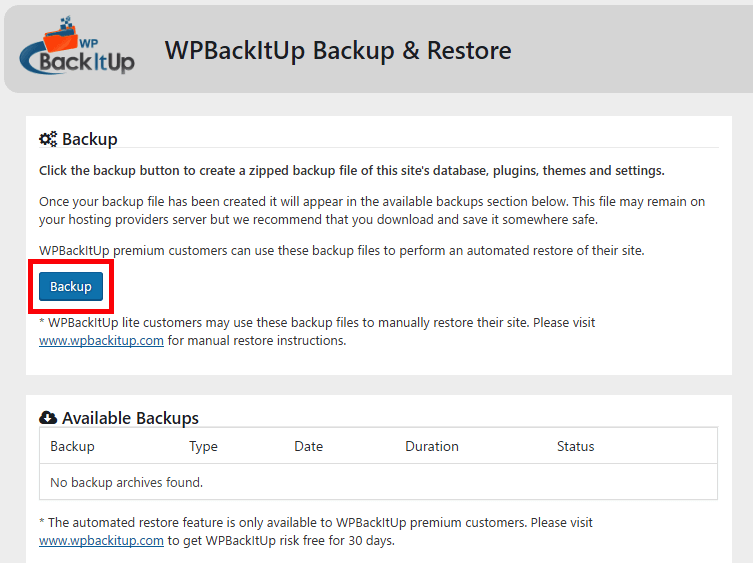
Next, find the Backup button and click it:
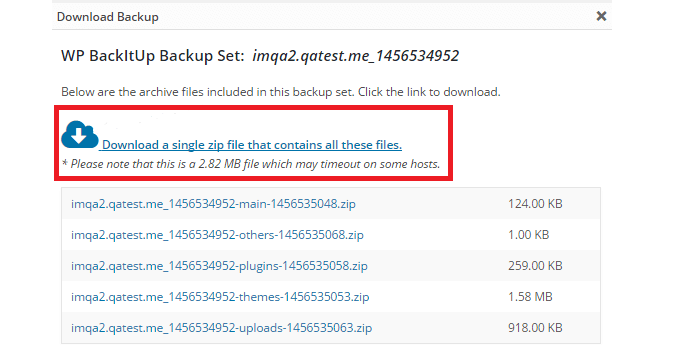
Once the backup is complete, you need to save it to a safe, offsite location. To do so, go to the Available Backups section on the Backup page…

…select the backup you would like to download, and then click the download button (boxed in red below):
The download will begin, and the backup will be saved to your computer in the form of a .zip file.
Step #2: Set Up a New WordPress Site
Whether you’re moving your WordPress website to an entirely new host or just to a different domain, you’ll need to go through the process of WordPress installation. The vast majority of hosts offer one-click installation from the back end. If your host doesn’t (which is highly unlikely), you’ll need to perform a manual installation.
Once your new WordPress site is set up, there’s one major thing to keep in mind: WordPress database table prefixes. We won’t go into the technical aspect of table prefixes here, as it’s not necessary to do so, but we will say that getting it right is an important part of the site migration process.
Fortunately for you, WPBackItUp will automatically handle any table prefix mismatches so there’s no need to worry if you are using the WPBackItUp one-click restore. But for those of you that aren’t, you should read our post: changing the table prefix . It isn’t too difficult but it is a crucial step that is often overlooked.
Once you’re all set – both in setting up your new website and ensuring that the table prefixes between your old and new installations are identical – you’re ready to move onto the third and final step.
Step #3: Restore Your Backup to the New Site
There are two restoration methods you can utilize for this step. The first is manual, and it can be quite overwhelming – especially for non-techies. The second method, however, takes minutes to complete and is available to you with the activation of your WPBackItUp plugin license.
All you need to do to get started is install WPBackItUp on your fresh WordPress installation, and copy and paste the plugin license into the Registration box on the right side of the Backup page. You’re now ready to use one-click restoration!
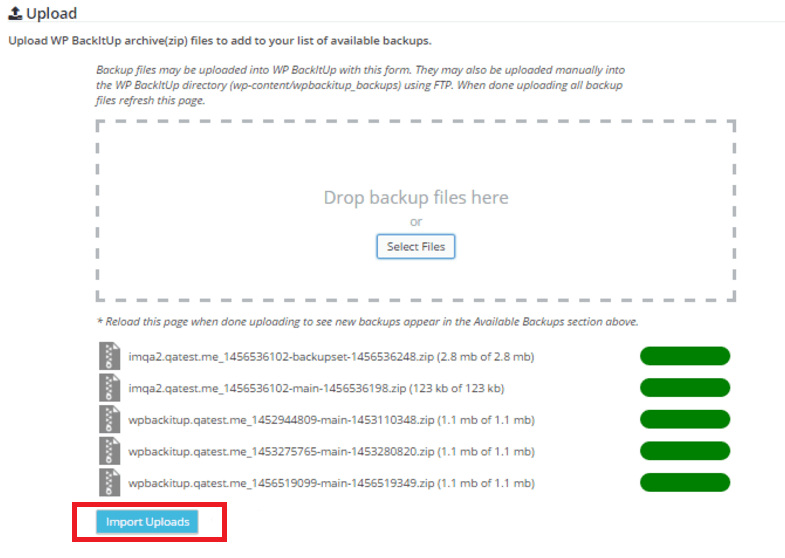
On your new WordPress site, navigate to WPBackItUp > Restore. Locate the Upload section, and simply drag-and-drop your site’s backup .zip file into the Upload box.
Once the files in the Upload section have finished uploading (you’ll notice the bars next to them are now completely green), click Import Uploads:
Last, find the Available Backups section on the bottom of the Restore page:
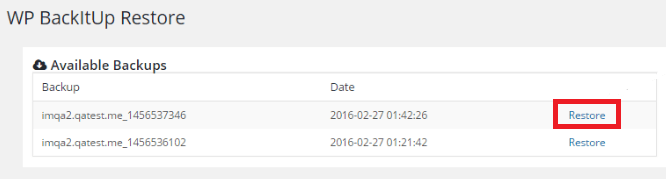
Click Restore for the backup you’d like to restore, and you can now sit back while WPBackItUp makes it all happen. That’s all there is to it!
Conclusion
Site migration is a process that needs to be done properly in order to protect website data and avoid site downtime. Fortunately, with a plugin such as WPBackItUp, you can painlessly perform your WordPress site migration in minutes.
In the above post, we showed you how to migrate your site in three simple steps. Let’s quickly recap them:
- Back up your site with WPBackItUp.
- Set up a new WordPress site.
- Restore your backup to the new site.
Do you have any questions about the site migration process, or how WPBackItUp can help? Let us know in the comments section below!
Image credit: Pexels.WPBackItUp