
If your reading this post you’re probably concerned about upgrading WordPress and wondering what to do if something goes wrong. Or maybe you already upgraded and it didn’t go as planned. The WordPress core team does a fantastic job of release testing but even the best teams can’t uncover every bug. Some common issues with major upgrades are:
- Your database upgrade doesn’t complete successfully.
- Plugins don’t work properly with the new version.
- Your theme doesn’t look like it did before the update.
No matter what the reason, sometimes there’s a need to revert back to the previous release and in this post, I am going to show you how to do just that.
But before I do, I would first like to clarify that downgrading WordPress to a previous release should always be considered a temporary solution. Being on the current WordPress release is extremely important for a number of reasons, the most important being that it ensures all know security holes have been patched. Running your site on an older version of WordPress unnecessarily exposes your site to security vulnerabilities. So while the rest of the post outlines how to downgrade, please understand that performing these steps should only be done temporarily until the issue causing the rollback is corrected. This is most often accomplished by just waiting for the next minor release of WordPress to be released.
Understanding Your WordPress Site
To begin, let’s first review what makes up your WordPress site. Your WordPress site is made up of three main components. The first component is WordPress Core; these are all the files that make up the WordPress runtime. The second component are the content files; these are all the files that make your site unique and include your theme, plugin, and media files. Basically, everything you install or upload to your site. There third and final component that makes up your site is the database. The WordPress database is used to store all data needed to run your site. This includes all the content that makes up your pages, posts, settings, user logins and much more.
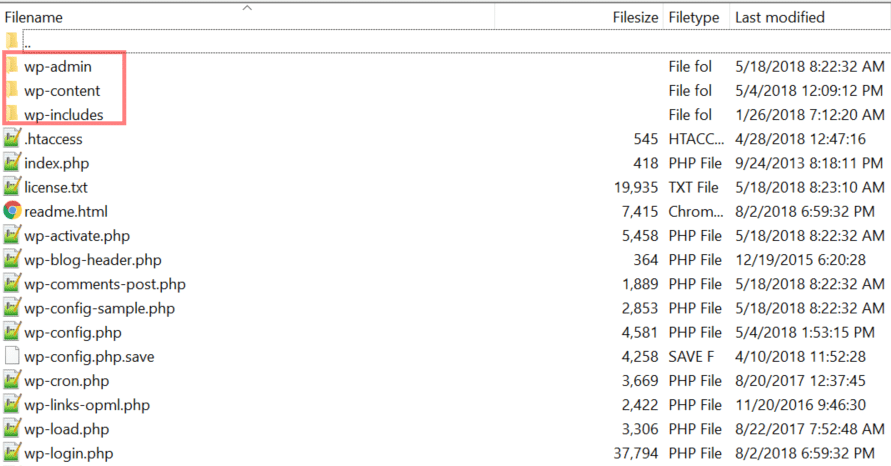
If you’ve ever browsed your WordPress install using FTP you may have noticed that your site is made up of 3 main folders: wp-admin, wp-includes, and wp-content. The first two folders: wp-admin & wp-includes are the folders that contain all of the PHP and configuration files that run WordPress. These are the WordPress core files. The third folder: wp-content contains the plugin, theme, and media files that you have either installed or uploaded. These are your content files.
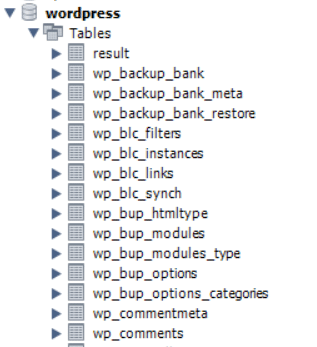
You may have never viewed your database but it likely looks a bit like the image below. Your database is made up of two components: the database definition(schema) and your site data. The WordPress core version and database definition version must always be the same for the site to work properly.
When you upgrade from one version of WordPress to another, only your database and the files in the wp-admin and wp-includes folders are updated. The files in the wp-content folder are only updated when you update your plugins and themes.
At this point, you may be asking yourself why any of this is important. Its important because downgrading your site is a complex operation that requires a general understanding of what makes up WordPress Core and what makes up WordPress Content.
Downgrading your site is a two-step process that must be done in the correct sequence in order for it to be successful. The first step is to revert the WordPress core files to the targeted version and the second is to restore your content (wp-content & database) from backup. Both are extremely important to a successful downgrade because the WordPress core files, content files, and database all work together and must be on the same version for your site to work properly. Performing only one of these steps may cause your site to become unstable or worse.
Now that you have a general understanding of what makes up WordPress and why it’s important, let’s get started with how.
Step 1: Have a Good Backup
You may not know this but when a backup is created using a plugin like WPBackItUp, only the content is backed up. This means that only the wp-content folder and the database are included, not the WordPress core files. WordPress Core files are intentionally excluded because they are freely available from WordPress.org. Including them would only slow down the time it takes to complete your backup and make the backup unnecessarily large. Additionally, when a site is hacked malware may be injected into the core files so it’s always best practice to start with a fresh install whenever possible.
The first step in downgrading WordPress starts with a good backup made using the WordPress release you want to revert to. So if your site is running WordPress 5.0 now but your only good backup was made when your site was running 4.9.7, then you must downgrade your site to WordPress 4.9.7 before restoring your backup. You never want to restore a backup that was made on a different version of WordPress because your content and core files version will no longer be in sync and your site may become unstable.
At this point, all you need to do is to identify what version of WordPress was running when the backup was made. For those of you using WPBackItUp, this information is stored in the “backupsiteinfo.config” file. This file can be found in the backup zip file containing the word “-main-“.
Now that you know what version of WordPress core you want to target you can proceed with downgrading WordPress.
Step 2: Downgrade WordPress Core
The easiest way to downgrade your core WordPress install is to use the WP Downgrade plugin. WP Downgrade is a very simple plugin whose only function is to set the target WordPress version used by the core update routines. Below is an excerpt from its description in the WordPress directory.
The plugin “WP downgrade” forces the WordPress update routine to perform the installation of a specified WordPress release. The Core Release you specify is now downloaded from wordpress.org and installed as any regular update .
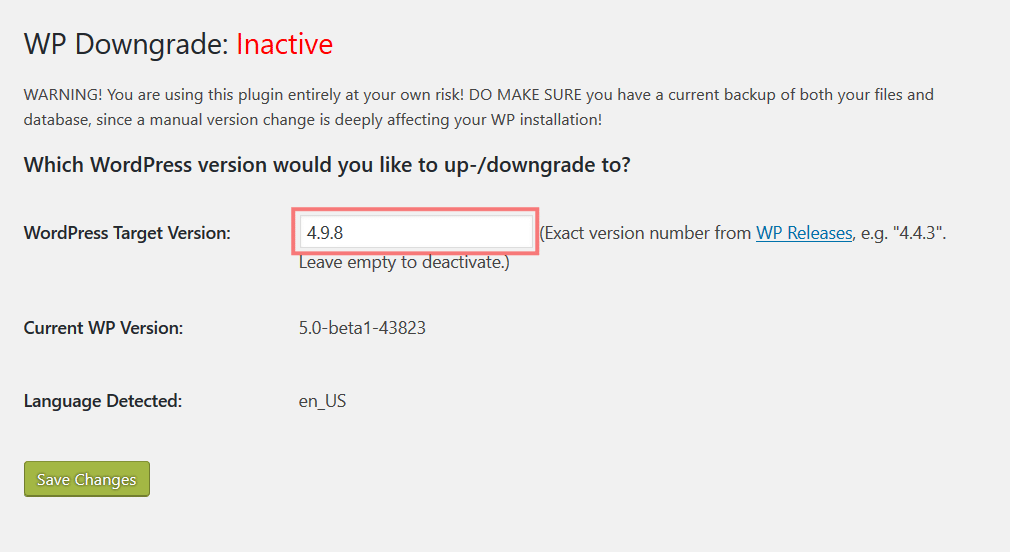
Once WP Downgrade is installed you will be able to set the targeted version of WordPress you would like to revert to. In the image below you can see that my demo site is running WordPress version: 5.0-alpha-43823. To downgrade my site to version 4.9.8 I would enter the version number in the “WordPress Target Version” field and then select the “save changes” button.
Once saved you will notice that WP Downgrade displays “Active (WP 4.9.8 is set as target version) ” identifying the targeted WordPress version as 4.9.8. This is telling you that WP Downgrade is doing its job. It has set the target version of WordPress to be installed.
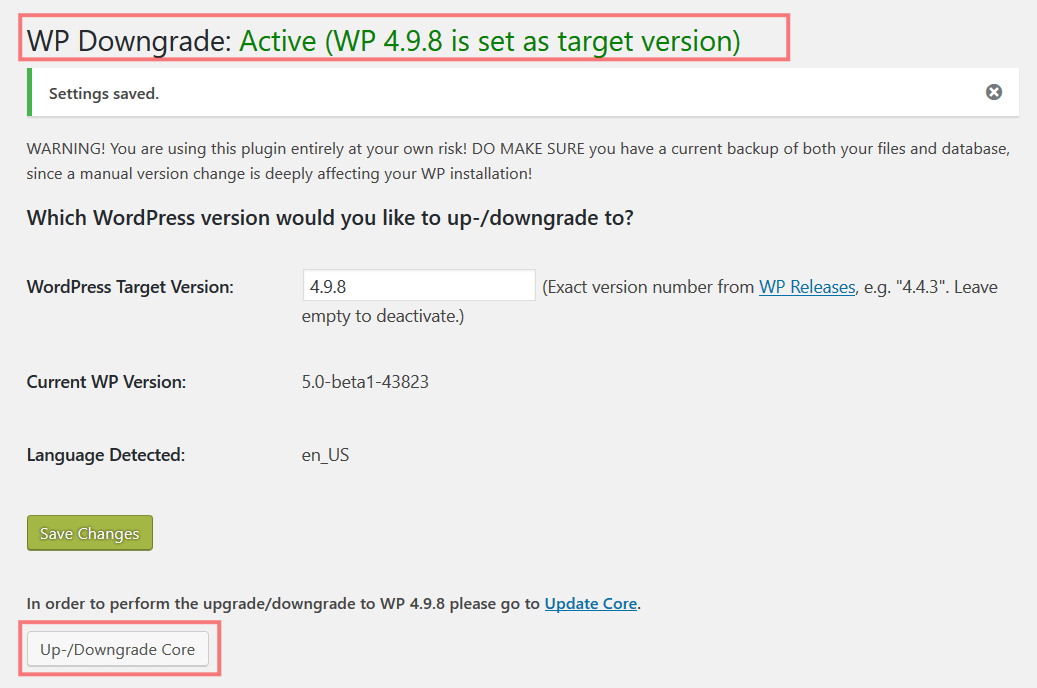
You will also notice that there is also a new button available “Up/Downgrade Core”. This button doesn’t actually perform the downgrade, it simply takes you to the WordPress updates page you are already familiar with (below).
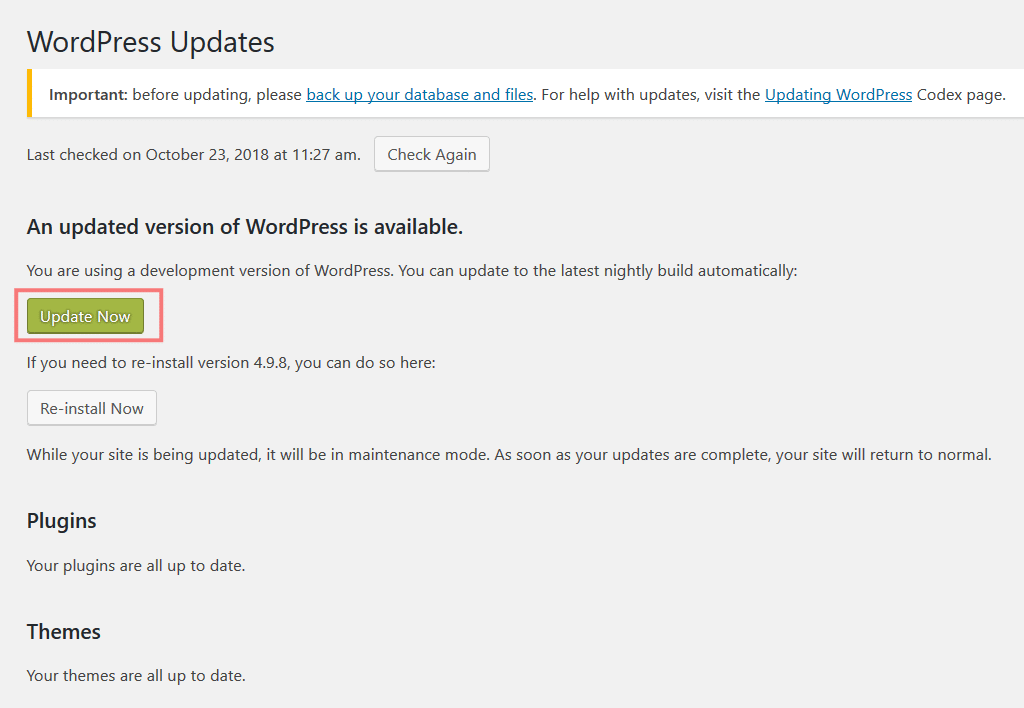
To downgrade, just click the “Update Now” button and let WP Downgrade and WordPress do the rest. Below I have included a short video of what it looks like when you downgrade from 4.9.8 to 4.9.7.
As you can see the process is very straightforward and leverages the core update functionality built into WordPress. When the downgrade finishes all the core files have been downgraded to the targeted version, in this case, WordPress 4.9.7.
Step 3: Restore your Content
Now that you have successfully downgraded your WordPress core files, there is still one very important step to perform. You must restore site content from your backup. This is important because while WP Downgrade did a great job of downgrading your core files, your database and content files have not been downgraded. Leaving the site in this state can cause unexpected issues so restoring your backup is critical.
To restore your site using WPBackItUp Premium you would first click the “restore” option which will take you to the WPBackItUp Premium restore dashboard. Next, identify the backup you would like to restore and click “restore”. Below is a short video that demonstrates restoring your site content using WPBackItUp Premium.
When the restore finishes WPBackItUp Premium will have restored all your content (wp-content & database) to its original state. Your WordPress core files and file content are now in sync.
Conclusion
In this post, we’ve provided a high-level overview of what makes up a WordPress site and why it’s important to understand before you attempt to downgrade your WordPress version. We have also outlined the steps required to successfully downgrade your WordPress install. To quickly recap, they are:
- Have a good backup.
- Downgrade WordPress using WP Downgrade.
- Restore your content using WPBackItUp Premium.
Do you have any questions about how to downgrade your WordPress install? Let us know in the comments section below!
Image credit: Pixabay.